An Easy Way To Do The Brenizer Method
When shooting portraits, it’s common practice to shoot with a medium telephoto lens at an aperture of f/1.8 or wider to get that dreamy bokeh effect, bringing your subject out of the background and allowing the viewer’s eye to be drawn to them. This is all well and good but what if you want to shoot wider to incorporate more of the background, which is often the case with wedding photography? (After all there’s a reason couples spend a lot of money on weddings venues!) But anything wider than a 50mm lens and the bokeh becomes less pronounced. That’s where the Brenizer Method comes in. Named after Ryan Brenizer, the wedding photographer who popularised the technique, the Brenizer Method is effectively a fancy way of stitching together multiple images to create a panorama. Whereas Panoramas are usually (though not always) landscapes, the Brenizer method is more focused on portraiture. You take several shots of your subject with a fast portrait lens and then stitch them together to create a wide angle image with the same shallow depth of field. Sounds easy, and it is, as long as you follow this simple workflow;
Camera settings
Camera settings are always an important thing to think about when out shooting, but with the Brenizer Method, it is absolutely crucial to be shooting in manual mode, with manual focus. The point of the exercise is to be creating an image with the shallowest depth of field possible so you want to be making sure that you are shooting with a lens that enables this. It’s recommended to go with a lens no wider than an 85mm and with a maximum aperture of at least f/1.8. The next step is to manually set your white balance. As you move across the scene if you were shooting with automatic white balance, then the colour would shift across the image. While it’s possible to match exposure and white balance later in post-production, it’s much more advisable to get it right in camera. Manual focus is also essential or at least the ability to lock your focus if shooting with back button focus (essentially separating the focus from the shutter button.) Once you have focused on your subject, you don’t want the focus to change as some frames that you shoot will be entirely out of focus background, which is necessary for the resulting effect!
Another choice you need to make is whether you’ll be shooting the images in RAW or JPEG. RAW will enable you to make much more variable edits later on but at the cost of having an absolutely huge file to work with whereas JPEG will be much quicker but be limited during the edit. It’s up to you which you choose, but I would always recommend RAW as when shooting across such a wide scene there are often large variances in exposure which are easier to correct when shooting RAW.
Shooting process
So now you have your settings locked in, your exposure is set, it’s time to start shooting the images that will make up your Brenizer Method portrait, right? Wrong! It’s all too easy to start snapping like crazy, but first, you should visualise how you’d like the final image to look. Make a note of where each corner is, setting a landmark in your mind. It’s also really important to explain to the couple what you’re about to do and guide them into a comfortable pose that they’ll be able to hold for as long as it takes you to shoot all of the frames. When you know exactly which part of the scene you want to capture, THEN it’s time to start shooting. Some people recommend a video tripod when shooting so that the camera is locked at one physical point but easily tilt-able. I have never found this to be too critical though, as long as you don’t move your feet and don’t lean forward or back too much then you’ll be fine. Become the ball head tripod!
The first image you shoot should be of the subject as though you weren’t about to do a Brenizer method. Here is where you lock your focus and take the shot, just as you would when shooting a regular portrait with the added bonus of still having a great portrait even if the Brenizer doesn’t stitch properly! After this first shot, your focus shouldn’t change. Now you have two options, either work your way around the subject in a circular motion, building the image outwards from this central point or work across in a line. No method is better than the other; this is all down to personal preference, whichever you think will be easier to ensure you don’t have any gaps in the scene. Whichever you choose make sure that your photos overlap one another by around 30%. This will help when your computer is stitching the images together as the algorithm relies heavily on matching parts of the photos to know where each image goes.

First step of the Brenizer method - take the photos!
When first starting to create Brenizer Method portraits you should begin by shooting only a few frames, maybe eight. As you become more efficient you can slowly increase the number of images, Ryan Brenizer himself will often create panoramas made up of over 100 frames! Just remember that the more frames you shoot, the more room for error and the larger the resulting image will be, file size and all.
Post Production
So now the hardest part is over it’s time to load the images into your software of choice. I find the easiest to be Lightroom though you can use Photoshop or any number of other platforms (though thankfully you no longer need to use Gigapano!) Once the images have imported, you can either make tonal edits now by editing the first shot (the ‘normal’ portrait) and copying your edits across to the other photos or leave the editing until you have the finished file. Select all of the images that will make up your photo, right click and select ‘Photo Merge’ then ‘Panorama’. Now, depending on the number of photos you’re stitching and the speed of your computer, go make yourself a cup of tea and wait patiently for the magic to happen. Once your computer has finished you’ll end up with something that looks a bit like this;
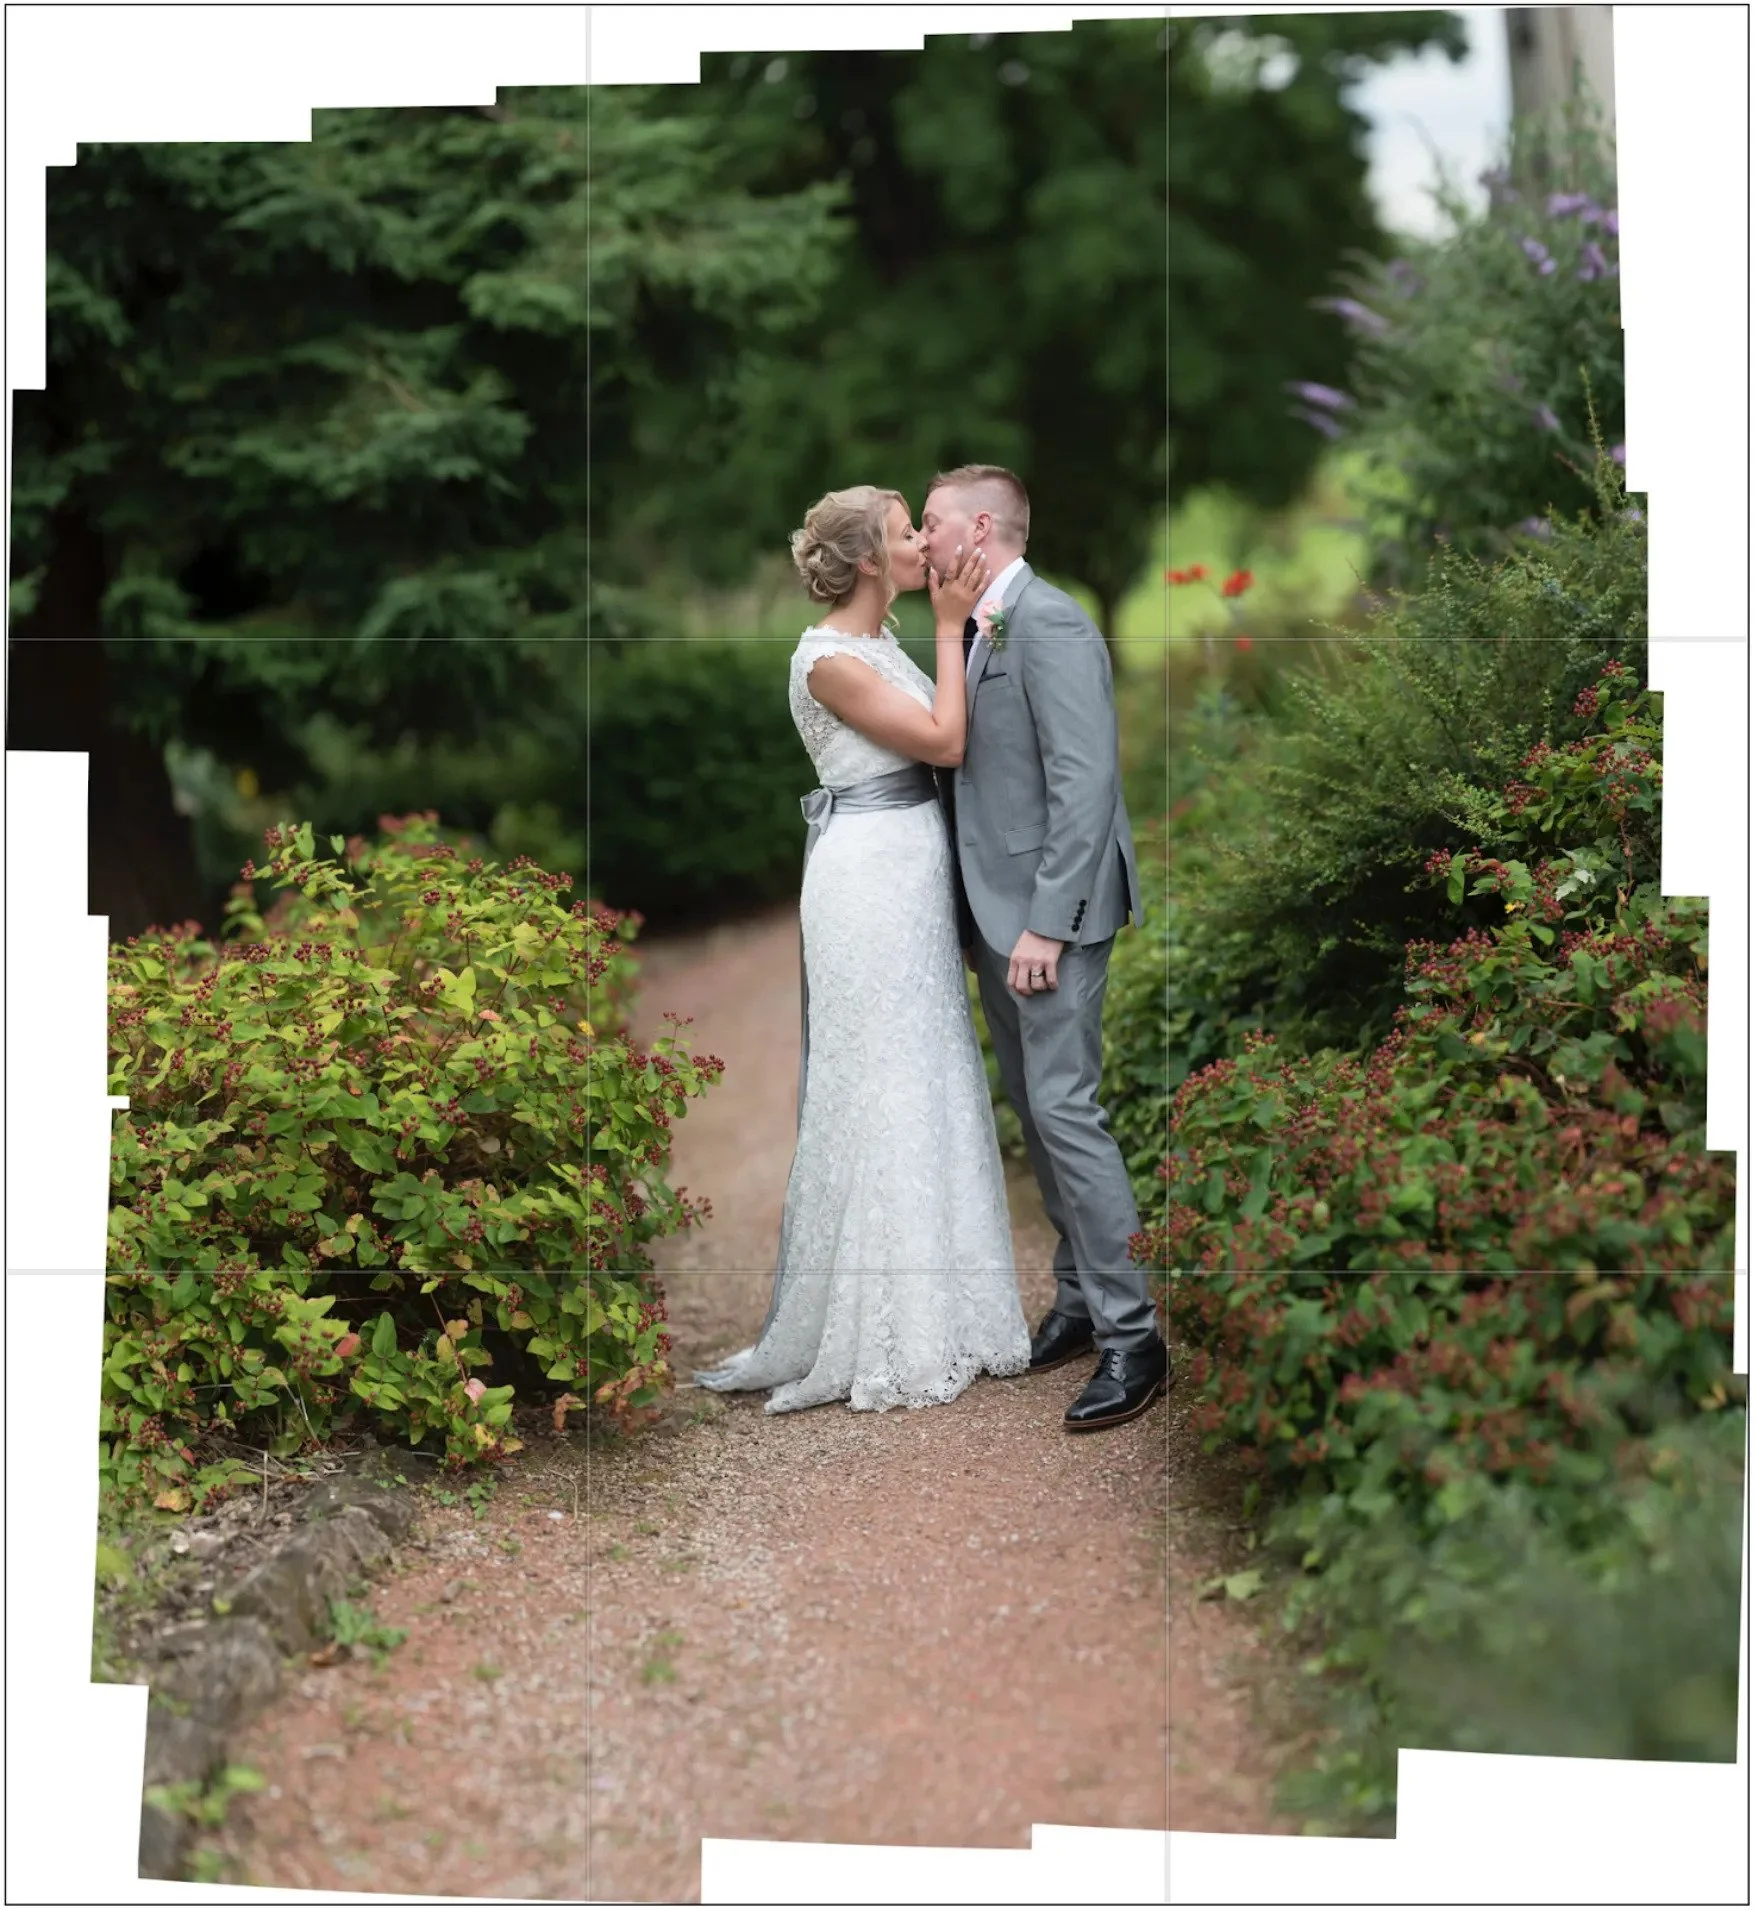
Brenizer Method after using Photomerge in Lightroom, prior to cropping
Simply crop how you’d like, do any tonal edits required if you didn’t make them beforehand, and you’re finished!

Brenizer method after cropping and editing
So there you have it, your very first Brenizer Method portrait! Let me know whether you’ve tried using this method before and any advice you may have for first timers.